Wednesday

Roasted Carrot and Fresh Ginger Soup


Here's a comforting* soup you can pull together when 
there is practically nothing in the refrigerator or pantry...
and you are busy. With other things.


Besides being healthful and budget friendly,
the additional bonus is that it goes together quite quickly.

All that is required are a few carrots, an onion, clove of garlic, 
bay leaf, chicken or vegetable broth or stock, oil/butter, 
salt and pepper ~
and fresh ginger (which I always have on hand for
cooking and use in smoothies.)


*I've been needing extra comforting recently,
and I'll explain why at the close of this post  . . .


The method goes like this:

Peel and cut the carrots into large chunks, toss with oil and 
roast in hot oven until tender.

Sweat chopped onion in a large pot, when translucent add minced garlic and
minced ginger for just seconds. Add broth/stock to pot, then bay leaf
and roasted carrots carrots. Add salt and pepper. Bring to a boil,
then reduce to a simmer, cook for 20 to 30 minutes.
Remove bay leaf. Taste and adjust seasonings.

Using either a blender (or an immersion blender) puree the
contents of the pot until silky smooth.

At this point you can stir in some heavy cream to make it creamy,
or a tiny amount of Harissa sauce (to make it spicier),
a little finely grated orange zest


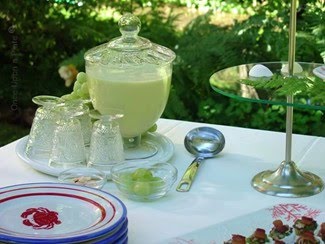
Garnish as desired;  here are some suggestions:

For each individual serving:
Shelled, roasted pumpkin seeds ~ (Pepitos)
a little lump of butter
finely chopped chives
finely grated orange zest
a small dollop of sour cream
toasted chopped nuts of your choice
buttery, crisp croutons
a tiny sprinkle of nutmeg or cinnamon


If you would like a printable copy of the recipe you


~*~*~*~*~*~


You may be familiar with the seasoning Harissa
the North African spicy red paste (or sauce),
if not here is the kind I use. (If you cannot find it locally, it's available
from amazon.com.)  It is really convenient to keep
a tube in the refrigerator to add a good, deep spicy 
flavor to all kinds of dishes.  You can also make your own,
but I don't use it that frequently so the tube version is the
way to go for me.


Word of warning ~ 
Do taste whatever brand you choose before
adding it to your recipe ~ it is potent!!


~*~*~*~*~


I've been a little distracted lately, 
my old faithful friend ~ my Black Labrador dog whom I've had
since he was just a little over 2 months old 
has been having some health issues, surgery, etc.  

It was non cancerous, he healed very nicely. 
He has been doing well for over a year.
and behaves much younger than his 13 years. 
Friendly, full of life and character, but so gentle and easy-going.

Sadly we recently learned he has bone cancer in his
foreleg... it is inoperable and the Dr. estimates the blasted
cancer will take over within 4 to 6 weeks. He is doing fine
at this time, on pain meds, and we will not allow him to suffer.
Lots of extra TLC being showered upon him now, while he's with us. 

Too soon 'THE' decision must be made, 
thus, the gray cloud hangs overhead. :(


Being "dog people", the news has affected us deeply ~ 
spending much more time with my pal, and not
so much the internet, or other things.

If I've neglected visiting your blog, or responding
to your lovely comments, emails, etc. I hope
you'll understand.  I'll try to do better.
Thanks for listening (reading!)


Thank you for stopping by today friends,
enjoy each minute of the day.

xo  ~Mari


Friday

Antipasto in Crispy Bite Size Salami Cups


When I saw this idea for an appetizer on 
the Columbus® Facebook page, I knew I
wanted to try it out.  Of course I tweaked it just a little.


A San Francisco tradition established in 1917
Columbus® products have been a favorite in my 
family for years and years. I particularly have fond
memories around holiday time when our dad would buy and 
bring home big sticks of salami from San Francisco on the train--
for gifts and snacking. 

(His job was in San Francisco and he commuted each weekday
 to and from our home on the SF Peninsula for dozens of years.
It was always treat to meet him at the train station at 5:25pm as he
stepped down from the train, neatly
dressed in suit and tie ~ briefcase in hand . . . 
 especially on the days when he had those big
paper-wrapped sticks of salami tucked under his arm! )


To make the 'cups' the pre-sliced Genoa Salame
works best because the diameter is larger than regular 
salame so it is easier to work with 
(the slices tend to shrink when baked.)

To bake, pre-heat oven to 375ºF. Tuck one slice
of salami into a small mold and press in.

I used these little Brioche molds but mini-muffin pans
work very well too. I found that sandwiching the
salami slice between two molds helps them hold their
shape while baking.


 If you have 2 identical muffin pans, put the
salami in the cups of one and carefully stack and press the 
second pan into the first, which will help keep the 
salami in place while baking.

Alternately, you can make small 'balls' out of aluminum foil and
place/press each of them down upon the salami slices in each mold ~
then bake. Personally I feel that is really wasteful, 
and would just skip this recipe and serve antipasto 
on a platter or plates instead.


Bake for 10 minutes or so. The salami will begin to
hold the shape of the mold as it begins to crisp in the
oven. It's best not to over-bake or the salami cups 
may shatter when it's time to fill them. 

(Hint: Place the molds or muffin pans on
a parchment or silicone lined rimmed baking sheet to catch
any drippings.)

When baked, remove from oven, allow to cool a moment,
it's helpful to turn molds or muffin pan upside down
to finish cooling. Before they are completely cool 
remove the 'top' mold or muffin pan.

You can make the "cups" a few hours up to one day
ahead, storing in air tight container.


Next, choose the fillings for the cups, 
just gather your favorites from
items found on the antipasto platter.

I chose:
 Black olives (brined), pitted and sliced in half
Pepperoncini, sliced
Roasted red pepper, sliced into small pieces
Marinated artichoke hearts, cut into small pieces


And some cheese goes really well in these cups.
I used the tiny, fresh 'perline' mozzarella ("pearls"),
but you can just cut other mozzarella into small
cubes. Or use another favorite cheese.

The cups themselves are rather salty and I think the
mozzarella is a good smooth contrast to the saltiness of
the other ingredients.


There are plenty of other options for fillings,
here are just a few:

Garbanzo beans (from the can, or home-cooked)
Sun dried tomato slivers
Pimento stuffed olives / other olives
Tiny cocktail onions
Small chunks of tuna or slivers of anchovy
Feta or Gorgonzola cheese crumbles
Scallions (thinly sliced)
Grape or Cherry tomatoes (sliced)
Fresh red or green bell pepper (slivered)
Marinated mushrooms (drained, and sliced if large)
Golden or brown raisins, (a few in each cup adds a nice contrast of flavors)
Bits of fresh parsley or basil leaves
Capers
Sliced tiny pickles
Slivers of red onion
Thin slices of carrot

Truly, whatever strikes your fancy.

~*~*~*~*~


How do you spell it?

Salami or Salame?

You be the judge ~ 
it seems there are varying thoughts here in the U.S.


photo credit: wikipedia
Antique Hungarian Salami Poster


Use your favorite brand of Salami in the recipe ~ I prefer the Genoa
type simply because of it's larger size; uncooked the kind I used
is about 3 1/4-inches in diameter, after being put in the mold
(plus shrinkage during baking) the cups are about 2 1/2-inch in
diameter measured from the widest points at the top of
the salami "cups".

If you make these, I hope you like them.


Thank you for stopping by, your comments make my day!

~Mari :)


(Full disclosure:  No recognition or reimbursement of any kind 
has been received from Columbus® products for featuring
their products in this post. I just happen to like their products.)


Sunday

Chicken Enchiladas (Slow Cooker Mexican-style Chicken Meat and Seasoning Mix)


Today I'm sharing my favorite Mexican-Style chunk/shredded
chicken that can be used in a variety of ways.

The good news is ~ 
It can be made in your slow cooker.
You can make just what you need 
or make plenty as this freezes really well.  
Just portion into freezer safe containers or plastic bags 
in the amount you'll need for each meal.


Use it for filling for:


or in 

Mexican-style Chicken Salads
Mexican-style casseroles
Mexican-style Soups (Caldo de Pollo)
Chilaquiles
Mexican Sandwiches Tortas
Spanish-Portuguese-style Migas
Colombian and Venezuelan-style  Arepas
In omelettes and frittatas
Also really good served warm over rice with melted cheese.


To season the chicken you can use a commercial
packet of Taco seasoning ~ but I really recommend making
your own.


 It's very simple, just combine the dry ingredients (you probably already
have them in your spice collection.)
This tastes much better than the commercial version 
and you know just what goes into the seasoning you make. 
You can control the degree of spiciness you prefer, 
as well as the salt content. 
Plus you can avoid preservatives, chemicals and artificial colors.

 For the Taco seasoning mix recipe Click here.
I always quadruple the recipe and store in an airtight jar 
and keep it with my spices.


To cook the chicken using the slow cooker:

Click here for the Mexican-style Chicken (Slow Cooker) recipe

You can use the chicken pieces you like best. Some prefer
boneless chicken breasts, but I prefer using bone-in, skin-on for
the extra flavor those pieces provided. (After the chicken is cooked
the bones and skin are easily discarded, then I skim any excess
surface fat with a spoon ~ or you can chill the boned/skinned cooked
chicken and broth and lift the solidified fat from the broth.)


If you are using 1 pound of boneless chicken breasts, 
this can usually be ready in less than 3 hours. 
But this depends upon the amount of chicken you are cooking,
the size of your slow cooker and if using boneless chicken
or not.

When using other pieces, I do cook longer to compensate for the
thicker pieces and bones, beginning on high for a couple of hours, then
shifting to the low temperature setting.

I cook until the chicken is very tender, until it easily be pierced, 
and using forks or your fingers, can easily be removed from the bones 
(but I make sure not to overcook so it remains moist and
flavorful, not dry and stringy.)


You can see that if I'm going to freeze some of the meat, I don't really shred it, but leave it in chunks. 
The quality seems better when frozen in larger chunks 
(If I use it shredded, I do so just before adding to the recipe.)


Here it is again, already to eat or use in your favorite recipes, skinned, 
boned, broken into large chunks after cooking. 
I de-fat the delicious, flavorful broth and spoon some over 
the chicken that will be eaten that day.

I divide the remainder, spooning it over the cooked, chunked chicken 
in each container before freezing. 

Besides being ready to use in your favorite recipes, 
it is delicious served over rice, or rice and beans. 
You can use some of the broth to flavor the cooking liquid for your 
rice and beans, too. 
I divide the remainder, spooning it over the cooked, chunked chicken 
in each container before freezing. 

The recipe for the seasoning and directions for slow cooking the chicken
can be found here
(Again, I always increase the amounts so I can have plenty of left-over chicken and broth to freeze.)


I don't freeze many things besides homemade soups/broth, marinara,
and pizza/bread dough, but I do freeze this. It is so handy to have on hand,
and tastes delicious even after freezing.


And here it is transformed into simple Chicken Enchiladas ~
for this version, I just warm some to the cooked chicken in a pan with
some broth, dip the corn tortillas in hot oil (until they are flexible) and
drain them on paper towels.  While still warm I fill the tortillas with
the chicken meat and roll them*. 

Secure with a toothpick if necessary and
place in baking dish (or place them in baking dish, 
seam side down so they do not unroll.) Spoon some enchilada
sauce** over and sprinkle lightly with shredded cheese.
Cover very loosely with foil and warm in a preheated 350ºF oven 
until hot throughout and cheese garnish has melted. This
only takes about 5 to 10 minutes if you've filled the tortillas
with warm chicken.


*May add shredded cheese with the chicken filling, but I didn't this time.


**For the Enchilada Sauce you may~


Used a canned commercial enchilada sauce; your favorite brand.

or


Here is a Red Sauce recipe I've shared in the past.

or

My favorite way for sauce
when making this version of enchiladas:

Use some of the broth from cooking the chicken--
chop a fresh onion, saute in a pan with hot oil until tender,
but not browned. Place the cooked onion in the container of
food processor or blender
add some of the broth from the cooked chicken along with 
some jarred salsa (choose your favorite brand.)
Whiz until smooth, adding chicken broth to make it desired
consistency ~ taste and adjust seasonings.

Tip:

To serve~

You might want to offer the following at the table, for
those who want to make them "supreme":

 grated or crumbled cheese --your favorite kind
sliced or diced avocado --or guacamole
diced/chopped tomatoes
fresh cilantro
sliced green onions
pitted black olives, sliced or halved
sour cream,
salsa or hot sauce 

I hope you enjoy!


Wednesday

Fig-Prosciutto Crostini with Brie, Walnuts & Rosemary


Some of the popular flavors of Fall, all combined into an
easy, tasty appetizer or snack The combination of
sweet and salty is practically irresistible!


If you have fresh figs, you could slice them in place
of the fig jam ~  substitute thin apple slices, or pears
for the sweet base if you like. 


The recipe is really versatile ~ you can substitute any
favorite jam or preserves, a different cheese and
other toasted nuts (or leave them out entirely.)


It's one of those easy recipes that you can put together
on a moments notice for unexpected guests.

I added the prosciutto, toasted walnuts and the 
rosemary needles as a garnish  (after broiling the bread --spread
with the jam and topped with a piece of Brie) ~
but if you want to assemble ahead with no last minute work, 
you could simply layer the toppings on the bread slices and 
bake in a hot oven until the jam is bubbling and the cheese is melted. 
The prosciutto becomes a little crisp, 
and the rosemary takes on a delicate, toasty crunch.

Cut the bread about 1/2-inch thick, then add the toppings. The texture is
best if you do not toast it first ~ just add the toppings and broil until the
jam is heated and the cheese is melted.


No need for an actual recipe, this one is
particularly easy to remember.

Other suggestions you might like:
Apricot, Raspberry, Peach jam, or a smear of honey; 
 other toasted pine nuts~ 
pecans, sliced (or chopped) almonds, or macadamia nuts.
Goat cheese, cream cheese, Gorgonzola or Blue, etc. ~

There are all kinds of possibilities . . .


Instead of serving as an appetizer or
snack,  substitute them for the cheese course after a special dinner.


Mix it up and try this idea with your own favorite toppings ~ 
I believe you'll enjoy.   


Thank you for stopping by
today, friends!


xo~Mari   :)


Saturday

30 Minute Flavorful & Healthful Split Pea Soup


Home Made, from scratch Split Pea Soup in 30 minutes?


Yes.
You can have one of the best you've ever tasted on
the table in about 30 minutes or less  - - - If you use a
pressure cooker.


Made with ingredients you probably have on hand in the fridge and
pantry.  (Bay leaves are missing in the pic.)


You can make this with bacon, kielbasa, ham, or leave
the meat out entirely ~ use vegetable stock or water
and have a vegetarian version.


Click here if you would like the recipe.

I like to garnish each bowl/dish with toasty croutons and a bit
of crumbled bacon (or finely diced ham or sausage.)

One of my favorites!
It is so good ~ a warming and filling meal on a
chilly, blustery day.


Without the pressure cooker the recipe usually takes
a couple of hours.  But the pressure cooker allows me
to whip up dishes that I wouldn't normally even consider on short notice
~ it opens up all kinds of possibilities. 
Which, in turn, helps me to be more flexible with meal planning.


So yes, I'm a pressure cooker fan!


Of all the brands and types I've tried (dating back to my
Vegetarian days back in the 70's) my favorites
are the stove top models, particularly Swiss made 
Kuhn Rikon Duralon® brand.

As soon as I began cooking with these,
I donated my self contained, countertop electric model to
charity, (and also said good-by to the old fashioned, 
hissing stove top versions -- you know the ones,
with their obnoxious 'rocker' mechanisms.)

The New York Times named the Kuhn Rikon the
Mercedes-Benz of pressure cooker, with good reason.
It's stylish, classic, good looking, and 
performs seamlessly!


Click here for :  My  favorite Pressure Cookers


Of course, you can get by with just one (most experts suggest going
 with about a 5 to 6 quart version) for your first, as most
traditional p/c recipes are written for that size. 


 I have several for convenience, and it would be difficult to
give any one of them up, I use them ALL. 

The larger ones for making big batches, for company ~ or to make
plenty for freezer meals; good for making homemade stock, canning
food, too.

The mid-size (5 to 6 quart are a good choice for all around everyday
cooking.)

I like the 3.7 quart for cooking smaller portions (for 1 to 4 people), and I use
it all the time for cooking vegetables, soups, and rice, and
other side dishes. (My electric rice cooker is designated for charity as well.)


Here are some of the main reasons I love cooking with pressure cookers, 
Kuhn Rikon brand in particular:

You can prepare in minutes meals/dishes that
take hours by traditional methods.
Stainless steel (not teflon lined, or aluminum based)
Extra safety designs built in
Ease of operation/use
Nearly silent operation (amazing!)
Vitamin retention
Flavor retention
Besides time, they save energy.
Swiss design, and built to last.

Excellent for campers and boaters, too!


And more from the Kuhn Rikon product description:

  • 18/10 stainless steel that won't interact with food.
  • Solid thermal aluminum sandwich in bottom for even browning and rapid heat absorption.
  • Five over-pressure safety systems, UL listed; automatic locking system; spring-loaded precision valve.
  • Saves time and 70 percent of energy normally consumed while cooking; 10-year warranty

~*~*~*~*~


Some of the foods I favor making in the pressure cooker:

Braised dishes; Short Ribs, Stews, etc.
(They always come out with full flavor, tender and juicy.)
Pork, Lamb
Chicken
Your own wholesome homemade stock in minutes
Chili
Pasta Sauces
Soups
Fresh vegetables
Vegetarian recipes
White Rice
Brown Rice
Risotto (delicious, and perfectly cooked) in 7 minutes!
Polenta
Grains
Beans/legumes (pre-soaked)
Pasta
Casseroles
Potatoes
Yummy Desserts


Here's a closeup of a handy guide that's included on the
lid of the 3.7 quart Anniversary edition, to give you an idea of the
time savings:


Love that! :)


~*~*~*~*~

By using different techniques, almost anything you
cook can be adapted to preparation in a pressure cooker.
It's easy, just requires common sense ~ and
here is one of my favorite websites to help you get started:

Hip Pressure Cooking


Check out Hip Pressure Cooking's video to see how
you can make risotto in 7 minutes:


Am I a fan of modern pressure cooking?
An emphatic ~ Yes!

I'll be sharing a few of my favorite recipes in the near future . . .
you just might want to get your pressure cooker out of storage
and give them a go! ;)


Happy Cooking, friends!

~mari :)

P.S. The opinions expressed here are my own, the Kuhn Rikon
people have no idea of who I am.  But I am very pleased with
their pressure cookers, and am happy to share the good news
with you.

A Sampling of my food . . .

Subscribe:

 Subscribe in a reader...or

Enter your email address:

Delivered by FeedBurner