Saturday

A Thank You Luncheon

Photobucket


Today I'm hosting a Thank You luncheon for my friend Gigi.
Gigi is an animal lover, who takes good care of my two birds if I'm away. And occasionally she will pet-sit the dogs and cat if they are not boarded.

Two of our other friends will join us, so it will be just four ~ and a vegetarian menu.


Photobucket


If things unfold as they usually do once my guests arrive, I doubt I'll have time for the camera but I'll try to capture some photos of the food as I prepare it and include the recipes in upcoming posts.


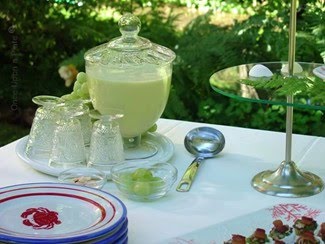
I set the table late last night, so that part I can share that much right now.


Photobucket


When it's just a small gathering I prefer to served in the dining nook/bay window next to the kitchen which adjoining the great room.


I'll have the fireplace lit, but since it has been so foggy and chilly I thought little glass flower pots with votives in them would warm up the table a bit.


Since Gigi loves birds, I've chosen a bird theme ~


Photobucket


I thought it would be a good time to use these bird plates, they are from Mary Carol Garrity, as are the embossed porcelain Czech chop plates underneath, which I've used as chargers.


Photobucket


Not much is blooming in my gardens right now, except the primroses, and the rosemary is blossoming. The Thanksgiving cactus would clash with the color scheme.


Photobucket


But I have PLENTY of Douglas Fir and other pines on the property, so for the centerpiece I chose a vintage milk glass candy dish on a silver tray with young Douglas Fir branch tips placed beneath it.


Photobucket


I can give a peek of one of the appetizers which I made yesterday (best if it mellows in the refrigerator for a day):


Photobucket


I just whirred up a traditional hummus recipe in the food processor.
Photobucket


And surrounded with store-bought baked sea-salt pita chips.
You can split and toast pita wedges if you prefer, but when I don't want to make them myself Stacy's brand is the one I use.
Photobucket


Instead of garnishing with a swirl of extra-virgin olive oil,
this time I plucked some baby mint leaves from the herb garden, sprinkled some toasted pinenuts and a few drizzles of vinegary hot sauce (like Frank's).


And now I better SCOOT, a few more last minute details before the doorbell rings.


I'll try to get some more photos of the food.


Photobucket


I had to dress the bird up a little for the celebration. :)


Photobucket


,

Friday

Savory Crostada


Photobucket

Giada Di Laurentiis had made something similar to this during one of her older episodes; it's a great recipe to remember when you want to pull a meal together with items you have on hand. I live over 10 miles from the nearest fully-stocked market so these kinds are recipes have become invaluable to me.

I use Julia Child's basic pâte brisée, my favorite, but you could use any pastry dough you prefer; including store-bought.

Photobucket

Just as the typical sweet costada; the pastry dough is rolled out , filling is placed in the middle of the dough but not to the edges. The edges are then folded over most of the filling, then it is placed in the oven to bake.

The following is just a guideline; you can substitute ingredients according to what is in the refrigerator and pantry.

For this one I used cremini mushrooms, a mixture of finely diced yellow onions & shallots, sauteed then splashed with a squeeze of fresh lemon juice.

Giada used mascarpone in her recipe; I didn't have any, but I had some cream cheese with sundried tomatoes and pesto in it so I used that instead, thinned with a little milk.

Photobucket

I added a diced tomato (squeezed out the seeds and extra juice so it wouldn't make the crust soggy.)

Giada suggests adding browned pancetta or bacon, again, none in my refrigerator so I used prosciutto cut into little squares, (I didn't brown it as it was very thinly sliced. I put it over the creamy mixture, along with the tomato) sprinkled that over right before adding the final layer of parmesan cheese.

Although I didn't make it exactly according to the recipe, it's the kind you can experiment with, making it very versatile. The technique, and the fact that it's flexible makes this one a standout. Very flavorful.

Pair it with a salad and you have a very nice meal.

Photobucket

Savory Mushroom Crostata/Crostada
4 Servings

1 1/2 cups all-purpose flour
1/2 teaspoon salt, plus 1/2 teaspoon
3 tablespoons butter, cut into small pieces
1 1/2 tablespoons lemon juice
1/2 cup mascarpone cheese
3 tablespoons ice water
2 ounces diced pancetta
1 teaspoon chopped fresh thyme (or rosemary, oregano, parsley, or a combination)
1 1/2 to 2 cups leftover side dish vegetables (like sauteed mushrooms and shallots)
1/2 cup grated cheese (try a combo of smoked mozzarella and fontina)
1/4 teaspoon freshly ground black pepper
2 tablespoons freshly grated Parmesan
1 large egg, lightly beaten

In a food processor combine the flour, and 1/2 teaspoon salt. Pulse to combine. Add the butter and pulse until the butter is finely chopped and the mixture resembles a coarse meal.

In a small bowl combine the lemon juice and mascarpone. Add the mascarpone mixture to the food processor and pulse a few times. Add the ice water and run the machine just until the mixture is moist and crumbly, but does not form a ball.
Do not over mix. Turn the dough out onto a sheet of plastic wrap. Press into a disk, cover, and refrigerate for 20 minutes.

Meanwhile, preheat the oven to 400 degrees F.

Cook the pancetta in a small saute pan over medium heat until golden and crisp, about 4 minutes. Add the herbs and stir. Transfer the pancetta, herbs, and the pan juices to a medium bowl. Add the leftover vegetables, grated cheeses, the remaining 1/2 teaspoon salt, and pepper. Toss to combine and set aside.

Place the chilled dough on parchment paper. Roll the dough out into a 12-inch wide circle about 1/4-inch thick. Spread the vegetables out in the center of the dough leaving a 2-inch border. Sprinkle the vegetable mixture with Parmesan.

Fold the border up and over the vegetables forming a crust. Using a pastry brush, brush some of the egg over the crust. Transfer the parchment paper and crostata to a baking sheet.

Bake until the crust is golden, about 25 minutes.

Slice and serve.

Recipe adapted from Giada De Laurentiis

~~~~~~~~~

A note about the plates:

I have received a couple of requests to describe the plates in some of my photos so whenever possible I'll try to note information about them.

These are glazed earthenware made in France, and were manufactured by Varages. The motif is that of fanciful bird, (in addition to stylized insects, flowers and leaves on the dinner plates.)

Now discontinued they command hefty prices on the secondary market, although they were available for a short time at outlets such as TJMaxx and Ross at bargain prices.

A couple of years ago an internet friend was kind enough to shop for a set for me to give to my sister-in-law. And shortly thereafter I was able to find a set of 6 each of the dinner and salad plates at a local tag/estate sale for a very reasonable price.

Photobucket

The pattern was also offered in blue and white; which is the original set I collected from TJMaxx. Again, inexpensively at the time.

Wednesday

Italian Sausage and Tomato Soup

Photobucket


You may have noticed I really like soup and make it quite often when the weather turns colder, it pleases on so many levels; easy to put together, produces an inviting aroma as it's simmering, budget friendly, one pot cooking, can be eaten with a spoon, or out of a mug, it tastes so good and comforting, and leftovers are most welcome the next day. It's one of my favorite meals.


My grandmother used to make a soup almost identical to this one, it's really good. I usually cut the recipe in half, and swap out the canned beans for any kind I have on hand. You can also add chopped zucchini, or other squash, etc. It's a recipe you can easily alter to your taste, for example:


This time I omitted the canned beans, pasta and spinach and added chopped fresh green beans instead.


Photobucket


Italian Sausage and Tomato Soup
Makes about 5 1/2 quarts; 10 to 12 servings


Notes: You can prepare soup through step 2 up to 1 day ahead, but do not bring mixture to a boil; instead, cool, cover, and chill. To reheat, lift off and discard fat; bring soup to a boil.


2 pounds hot or mild Italian sausages
3 carrots (12 oz. total), peeled and chopped
3 stalks celery, chopped (optional)

1 medium to large yellow onion, peeled and chopped
4 cloves garlic, peeled and chopped
3 quarts chicken broth
2 cans (14 1/2 oz. each) diced tomatoes
2 cans (15 oz. each) cannellini (white) beans, rinsed and drained
1 tablespoon dried basil
2 cups dried large shell-shaped pasta
4 quarts spinach leaves (about 12 oz.), rinsed
Salt and pepper
About 1 cup grated parmesan cheese


Brown sausage an 8- to 10-quart pan over high heat and stir often, breaking apart apart with a spoon, until browned and crumbly, 8 to 10 minutes. (Squeeze sausages from casings, then brown, if you're not using bulk sausage).
Spoon out and discard all but 1 tablespoon fat from pan.


Add carrots, onion, (celery if using) and garlic; stir often until onion is limp, 5 to 7 minutes. Add broth, tomatoes (including juice), beans, and basil and bring to a boil.


Add pasta, reduce heat, and simmer, covered, stirring occasionally, until pasta is just tender to bite, about 10 minutes. Skim and discard fat. Stir in spinach and cook just until it is wilted, about 30 seconds. Add salt and pepper to taste. Serve soup from the pan, or pour into a tureen.
Offer parmesan cheese to add to taste.
Recipe adapted from Sunset Magazine

I like to add a little extra garnish to most of my soups; this time I toasted some baguette slices and topped them with a small dollop of rouille. Here's my simplified version:


Quick and Easy Rouille
(The Traditional finish for Provencal Fish Stew)

1/4 cup good quality mayonnaise
1 Tablespoon roasted red peppers; from the jar (optional)
1 clove garlic, minced
good size pinch cayenne pepper

If you are using the roasted red pepper; whir all ingredients in the bowl of a small food processor until very smooth.
If you are not using the roasted red pepper simply stir ingredients together.

May be made ahead, cover and refrigerate until serving time.

~~~~~


Photobucket


I served them with Parmesan Drop Biscuits brushed with garlic butter.
A good warming meal on a chilly, foggy evening!

Tuesday

Not your Momma's Cheese Ball...

Photobucket


My mother would always make a few Cheese Balls or Cheese Logs to serve around holiday time, and not the ordinary variety; always some good ones with a bit of a twist. But never one like THIS one!


Photobucket
This one has lots of things going for it; and is deliciously different than any cheese ball I've ever tasted.

The first bite will surprise you with a multi-layered flavor & texture burst. A wonderful play of salty-sweet followed by the creamy-rich, warm scent of curry mingling into the mix makes a compelling combination.


I came across the recipe on one of my favorite blogs;
Robin Sue's Big Red Kitchen .


Robin Sue ALWAYS has something wonderful going on over there. I urge you to go check her blog out, it will likely become one of your favorites, too (if it isn't already.)

Thank you Robin Sue, and Karen V for sharing the recipe.
This certainly would make a perfect holiday appetizer ~


Photobucket


Curried Cheese Ball

8 ounces cream cheese
1 cup shredded cheddar cheese
3 Tablespoons dry sherry (Cocktail Sherry, not cooking sherry)
1 Tablespoon Worcestershire sauce
3/4 teaspoon curry powder
1 clove garlic, minced
1/2 teaspoon freshly ground black pepper
pinch cayenne pepper

~~~~~~

For the Coating~

2 to 3 Tablespoons prepared Chutney of your choice
1/2 cup shredded sweetened coconut
1/2 cup finely chopped salted peanuts
1/2 cup thinly sliced or finely chopped scallions/green onions; both white part and green tops


For the cheese mixture:

Place all ingredients (except coating ingredients) in the bowl of a stand mixer and blend until smooth.
Note: You may also use a powerful hand mixer to mix ingredients

Select a two cup container (a bowl or jumbo cup, etc.) line interior with plastic wrap, leaving an overhang of plastic film over the outside edge.

Place the cheese mixture into the plastic lined container and pack down evenly. Fold plastic overhang over the top to cover. Refrigerate for at least four hours or preferably overnight. May also be frozen at this point.

To assemble, shortly before serving:

Uncover the top plastic film and invert cheese ball onto a serving platter. Peel off the rest of the plastic.

Spread a thin layer, about 2-3 tablespoons of chutney over the surface of the cheese ball.

Combine the remainder of the coating ingredients in a small bowl and toss until evenly mixed. With your hands evenly sprinkle and press the coating mixture into the chutney so it adheres.

Tip: You can use a piece of plastic wrap between your hands and the coating to assist in pressing so it doesn't stick to your hands.

Refrigerate until serving time; serve with plainly flavored crackers. Buttery or whole wheat crackers are very good with this cheese ball.

Robin also suggests that you can make a layered dip out of this; simply assemble as you would a 7-layer dip ~ the cheese spread sprinkled with the coating mixture, then repeat until the ingredients are used up.


Photobucket


It is VERY good!


Photobucket


Mom would approve!


Photobucket


Postcard ~ Near Home


Photobucket
~
Oregon Coast
30 November 2008


.

Monday

Creamy Turkey Noodle Soup

Photobucket


To my mind Turkey Soup after Turkey Day is one of the treasured bonuses of the celebration.


Most of the time the Turkey-Vegetable Soup I make is of the brothy variety.


But I'm not a fan of shredded poultry in my chicken or turkey salads, ditto with my chicken or turkey soups; so I usually always make the chunky kind.
No "mystery" shreds; I like to see and taste the chunks, and they fit on the fork or soup spoon much more neatly, too.


Photobucket
Yesterday (after an exhilarating trip to the coast), insteady of a brothy soup, a creamy noodle soup with plenty of vegetables seemed to be just the thing.
Many times when I'm cooking I don't use a recipe, that's what makes cooking a fun and creative outlet for me. I think many of us cooks do the same thing.
But it can be aggravating if you are one who must have a recipe to follow, so I apologize in advance. This is another one which I'll describe rather than give an exact recipe.
But it's okay! Just follow your instincts adjust to the thickness you're looking for, and taste and season until you're satisfied.
Use any vegetables you happen to like.

Photobucket


Creamy Turkey Noodle Soup


A couple of notes to begin:

Noodles of your choice (cook them separately, or they tend to disintegrate otherwise)

Use any vegetables you happen to like, or have on hand.
My favs for this soup are onions, celery, carrots and (frozen)peas, added just before serving just to heat through, so they remain a bright green.

I like chunky chicken or turkey soups, not shredded so I cube the cooked meat.

In the soup pot heat about a tablespoon of vegetable oil, add the chopped onions & stir occasionally until just translucent. Add the sliced carrots, stir for a minute or two then add the celery.

Add chicken stock or broth to the pot, (add as much in volume as soup you would like to make).
Add a sprig of thyme if you like.

Bring to a simmer and allow to simmer until carrots are tender.

While vegetables are simmering make a thick white sauce in a separate pot. (Easy to find recipe for thick white sauce on-line.)

When veggies are tender, remove the thyme sprig & discard. Add one ladle-ful of the hot stock to the white sauce to loosen it up.

Then add the thinned white sauce to the pot of veggies and broth/stock. Stir or whisk until incorporated and smooth.
Note: If you like an even thicker soup (which I do in this case),make a Beurre Manié * and blend it in, a bit at a time allowing the soup to simmer and thicken until it is to your liking.

Lastly, gently stir in the turkey chunks and heat through; you can stir the cooked noodles in at this time*,
then stir in the frozen peas, they take no time to thaw and warm through.

I like to place the warm noodles in the bottom of warmed soup bowls, then ladle the soup over the top (I don't like overcooked noodles, for this kind of soup I store them separately, then reheat together for subsequent meals.)
A little extra effort, but improved texture, imo.


Photobucket


* Beurre Manié:
Literally; "hand butter"

In this magical French thickener equal amounts of butter and all-purpose flour are blended together to form a smooth paste, to be added to hot liquid, then simmered acting as a thickening agent.

Surprisingly, even though the flour is not cooked ahead of time, there is no raw flour taste when using this thickener.
I just mix it up as I need it (equal amount of soft butter and all- purpose flour, blended until smooth) no need to form into balls. Or you can make it in advance & shape it into convenient to use balls, to have on hand to thicken gravies, stews, soups and such.

Beurre Manié


4 tablespoons all-purpose flour
4 tablespoons butter


Method:

Blend butter and flour well; shape into 4 to 6 balls.
Refrigerate separately on small plate to allow to firm up; then place in covered jar and keep refrigerated until needed.
Recipe is easily multipled.

Taste and adjust seasonings; freshly ground black pepper is the friend of this soup. Garnish with chopped fresh herbs such as thyme or parsley if you like.


A Sampling of my food . . .

Subscribe:

 Subscribe in a reader...or

Enter your email address:

Delivered by FeedBurner