Thursday
Postcard from the Garden ~ End of July
Wednesday
Little Fried Fresh Peach Pies

 And a lovely, tender pastry dough it is. Baking powder in the dough makes the finished product puff beautifully while shallow-frying in canola oil. After allowing the pies to drain on a cooling rack they are not oily tasting at all. They can then be sprinkled or rolled in cinnamon sugar.
Of course you can just cut the rolled dough with a knife into desired shapes, then crimp to seal the filling, or use a dumpling maker, but I favor this little "Tart Master" as recommended by the late cook book author, Lee Bailey. They make quick work of either savory or sweet little pies/tarts.
I haven't checked, but they still may be available. I haven't been able to locate a website for the company, so it would be best to telephone.
Update: A very kind reader let me know that The Pampered Chef, Ltd. also offers a similar mold/press as the one in the photos. Thank you so much for the information!
Tuesday
Shrimp and Cream Cheese Chili Bites
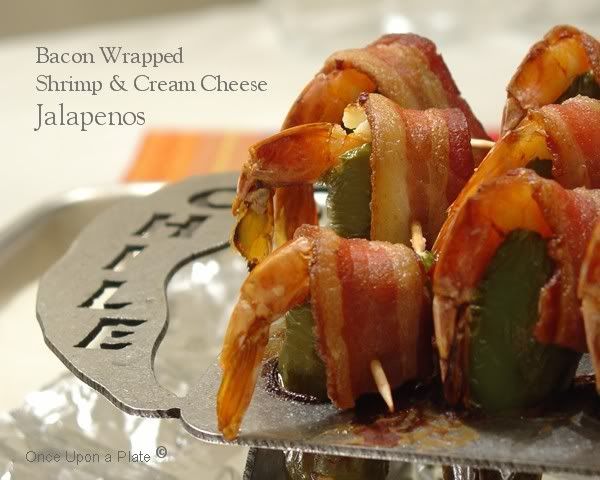
I don't make these very often, but they are fun to serve at summer parties, or casual events like a
Superbowl Party, etc.
I bought the grills online from http://irondesert.com/ a couple of years ago for a Mexican-themed summertime party.

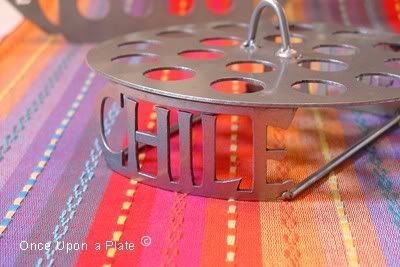
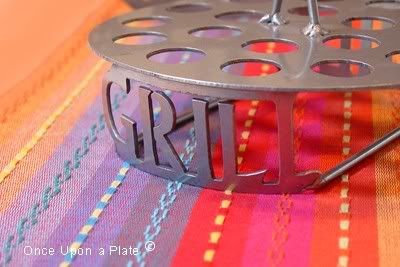
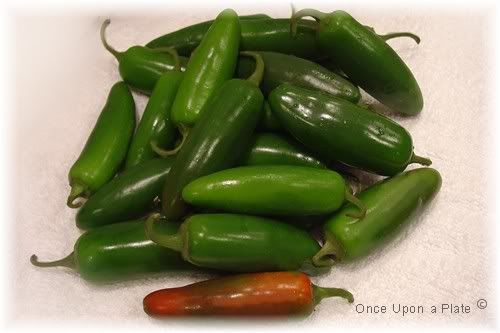
The "heat" of each crop of jalapenos can vary widely,from mild to very HOT, so beware.
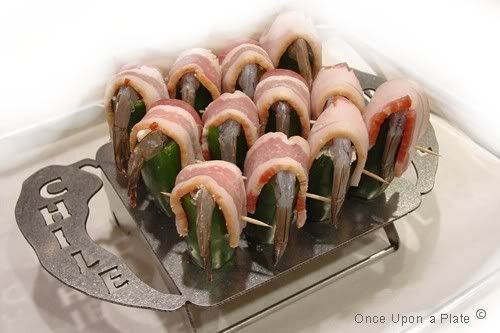 Ready for the oven, or covered grill.

Monday
Chicken Piccata to GO
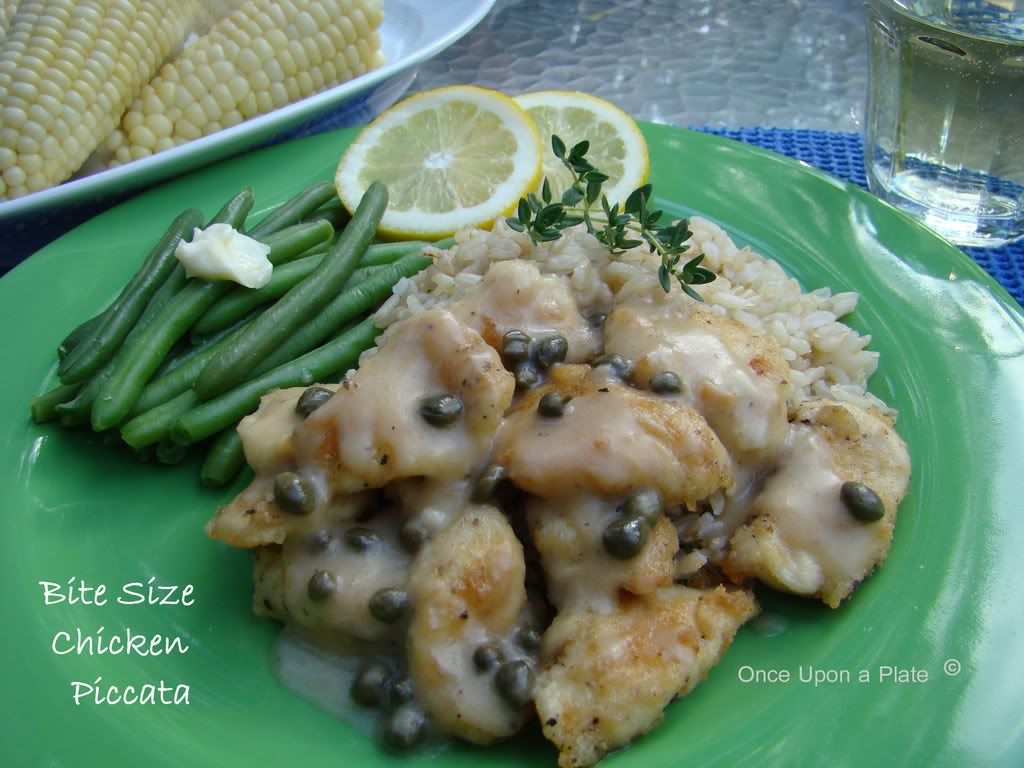
I devised this method of preparing Chicken Piccata to save time ~ it has all the flavors of the traditional method, but eliminates the horizontal slicing and pounding the boneless breasts. It just requires a little more knife work.
I simply slice each breast into 3 to 4 length-wise sections, then slice each of those rather thinly into bite-size pieces. Season with salt and pepper, toss with all-purpose flour; shaking off excess and the chicken is ready for the pan. Continue with recipe as you normally would, it's usually best to lightly brown the chicken in two batches so it cooks evenly.
A great way to serve this favored dish at a party, too! No need for a dinner knife.
Mar-a-Lago's Fabulous Turkey Burgers

Chicken Caesar Salad ~ Jaime Oliver's Version
Saturday
Szechuan-Style String Beans

Chef Chu has been a very popular celebrity chef, cooking school teacher & restaurant owner in Los Altos, CA. for over 20 years.One of my favorite recipes (of many favorites) from Chef Chu, it is found in his cookbook "Chef Chu's Distinctive Cuisine of China". I alter the recipe a little, as I don't "oil-blanch" the beans, I simply stir fry, then steam them, by covering with a lid, until just tender.

Chicken Tsukune (Yakitori) Chicken Meatballs
Ruth Chris' Style Barbeque Shrimp


Having plenty of crusty bread to dip up the sauce is crucial.

As well as fresh lemon slices.
Ruth Chris' style Barbeque Shrimp Recipe
My notes: I halved the following Barbeque Butter recipe, and still only used half of what I made and that amount was PLENTY. Other reviewers had the same response.
Barbeque Butter:
1 pound Butter
2 teaspoons Black Pepper
1/4 teaspoon Cayenne Pepper
1 1/2 teaspoon Paprika
1 teaspoon Salt
1/2 teaspoon whole dried Rosemary Leaves (measured, then finely chopped) [I used 1 1/2 teaspoons fresh rosemary, finely chopped]
2 ounces (1/4 cup) Garlic, finely chopped
2 teaspoons Worcestershire Sauce
1 teaspoon Tabasco Sauce
1 1/2 teaspoons Water
Additional ingredients for preparing the shrimp:
1 tablespoon plus 1 teaspoon Olive Oil
1 pound (16-20 count), cleaned, peeled and deveined shrimp
1/4 cup chopped Green Onions
1/2 cup dry White Wine
And:
Sourdough Bread, for serving
Slice lemons, if desired.
DIRECTIONS:
First make the Barbecue Butter:
1. Soften butter at room temperature to 70-80 degrees.
2. Place butter, pepper, cayenne pepper, paprika, salt, rosemary, garlic, Worcestershire, Tabasco, and water into mixing bowl.
3. Whip on high speed 3 minutes or until thoroughly blended.
4. Refrigerate to 40 degrees. (I skipped this step as I made the butter right before I needed it, with no problem.)
For the Shrimp:
This will use only 1 cup of the butter; reserve extra for another use. (Be warned the recipe makes about 2 1/2 cups!)
1. Pour olive oil in a hot sauté pan.2. Add shrimp to the sauté pan and cook on one side for 1-2 minutes. (Don't crowd; if necessary, use 2 pans. A 12-inch pan will accommodate 1 pound of shrimp.)
3. Reduce heat to medium, turn shrimp, and add the chopped green onion. Cook for an additional 1 to 2 minutes.
4. Add white wine and cook until reduced to 1/4 cup.
5. Stir in 1 cup cold Barbecue Butter, reduce heat to low and cook and stir frequently until shrimp are just done (white throughout, moist and tender), approximately 1 1/2 minutes.
Take care not to overcook the shrimp.
6. Serve immediately in preheated bowl or bowls along with bread for dipping, and lemon slices.
Proclaimed excellent!
Sesame Tortellini Spoons
 Thumbs Up! A wonderfully flavorful amuse-bouche.
I used a mild cheese tortellini as I couldn't find ones with plain chicken or meat filling. Even though Cheese is not usually associated with Asian food, these worked out exceptionally well.
 Perfect party food, as they can be assembled ahead and served at room temperature.
  I drizzled one scant teaspoon of dip over each spoon, as it's highly flavored.
Sesame Tortellini Recipe
adapted from Emily Richards
(My own notes are in the brackets)
1 pkg (350 g) fresh meat tortellini
[I recommend mild cheese tortellini. I used the tiniest I could find; dried, sold in the box.]
1/4 cup (50 mL) finely shredded Napa or Savoy cabbage
[I had angel shred packaged cabbage on hand, so that is what I used]
3 tbsp (45 mL) finely diced red pepper
2 tbsp (25 mL) chopped fresh coriander
[If you don't care for coriander/cilantro, try very thinly sliced scallions instead]
2 tbsp (25 mL) sesame oil
1 tsp (5 mL) minced fresh ginger
Dipping Sauce:
1/4 cup (50 mL) soy sauce
3 tbsp (45 mL) seasoned rice vinegar
Method:
1. Boil tortellini in large pot of boiling salted water for about 5 minutes or until they are tender but firm. Drain well and place in large bowl. [You can cook ahead and cool, (refrigerate if made ahead), then combine the remaining ingredients shortly before serving.]
2. Add cabbage, red pepper, coriander, sesame oil and ginger and toss to coat well. Set aside.
3. Dipping Sauce: Whisk together soy sauce and vinegar until combined.
4. Divide 2 tortellini among Asian style soup spoons and drizzle each with some of the sauce. Or alternatively, serve tortellini with toothpicks and dip into sauce to serve.
Serves 10 to 12 as an appetizer
 Keeper!
Friday
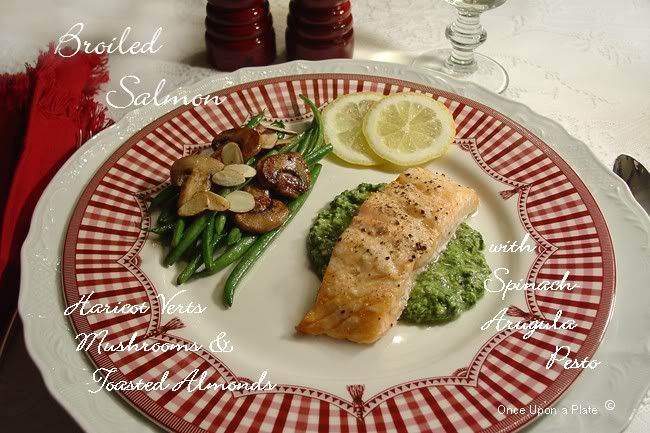
Broiled Salmon with Spinach-Arugula-Walnut Pesto
Hand Painted Cookies
They are fun to create; it's a chance to let your creativity flow, and everyone seems to love them. They are completely edible, here are some I made earlier this spring.


Here' is the sugar cookie recipe that I use for these ~ from an old Sunset Magazine:
Favorite Cut-Out Sugar Cookie
Makes about 45 2 1/2-inch cookies
I roll the dough thicker; thus the dough produces fewer cookies
Ingredients:
1 cup (1/2 lb.) butter, at room temperature
1/2 cup sugar
2 large egg yolks
1 teaspoon vanilla
2 1/2 cups all-purpose flour
Preparation
1. In a bowl, with an electric mixer on medium speed, beat butter and sugar until smooth. Beat in egg yolks and vanilla. Stir or beat in flour until well blended.
2. Divide dough in half. Flatten each portion into a 1-inch-thick disk. On a lightly floured board, with a floured rolling pin, roll dough, a portion at a time, to 1/8 inch thick.
3. With floured cookie cutters, cut dough into shapes (if dough is too soft to handle, freeze briefly until firm).
4. With a wide spatula or your fingers, transfer cookies to buttered or cooking parchment-lined 12- by 15-inch baking sheets, spacing them about 1 inch apart. Gather scraps, pat into a ball, and repeat rolling and cutting.
5. Bake cookies in a 300° (F) oven until golden, about 15 minutes; switch pan positions halfway through baking.
6. With a wide spatula, transfer cookies to racks to cool. If hot cookies start to break, slide a thin spatula under them to release; let stand on sheets to firm up, about 5 minutes, then transfer to racks to cool completely.
Recipe from "Sunset" Magazine
* These are best made a bit thicker, not thinner & are easier to grasp to dip in the icing that way.

Honestly, sometimes I like my blotting towel more than my painting! It's like that feeling you get when you dump all the Easter egg coloring dye colors in the sink.
~ Welcome to Once Upon a Plate ~
I find inspiration for recipes from many different sources; blogs, message boards, cookbooks, and magazines.
Most recently a recipe posted on one of my favorite blogs http://www.101cookbooks.com/ captured my interest, an easy-to-make rustic cake.

A simple batter, fruit topping and a sprinkle of coarse sugar and coarse salt is the finishing touch before baking off. It was very good, not too sweet and a recipe I would definitely make again; great for dessert, snacking or even breakfast!
I tweaked Heidi Swanson's recipe a bit, as follows:
Directions:
Spoon the batter into the prepared pan, spread with a spoon or spatula to the edges. Place the fresh or frozen berries over the top. Sprinkle evenly with the large grain sugar and then the salt.*


